How to Pass the edTPA Teacher Performance Assessment
A practical guide to passing the edTPA teacher performance assessment, covering the three tasks, video submission, commentary writing, and scoring rubrics.
Table of Contents
- What Is the edTPA?
- Understanding the Scoring Rubrics
- Task 1: Planning for Instruction and Assessment
- The Learning Segment
- Academic Language
- Commentary Tips for Task 1
- Task 2: Instructing and Engaging Students in Learning
- Recording Your Video
- Choosing Your Clips
- Task 2 Commentary
- Task 3: Assessing Student Learning
- Analyzing Student Work
- Feedback Commentary
- The Commentaries: Writing That Actually Scores Well
- Time Management: The Biggest Challenge
- Using Support Resources
- The Mindset That Makes the Difference
The edTPA is unlike any other certification assessment you’ll encounter in education. There’s no multiple choice section. There’s no single exam day. Instead, you’ll spend weeks building a portfolio that documents your actual teaching, including lesson plans, video recordings of yourself teaching, student work samples, and extended written commentary analyzing all of it through the lens of educational research.
For many teacher candidates, it’s the most demanding thing they’ve done in their program. Not because the content is impossibly difficult, but because it requires a very specific kind of thinking that takes time and practice to develop: the ability to articulate why you’re making every instructional decision you make, in the formal language of teaching theory.
This guide will walk you through what the edTPA actually involves, where most candidates struggle, and what you can do to give yourself the best possible chance of passing on your first attempt.
What Is the edTPA?
The edTPA (Educator Teacher Performance Assessment) is a pre-service teacher performance assessment developed by Stanford University’s SCALE (Stanford Center for Assessment, Learning and Equity) and administered by Pearson. It’s currently required for licensure in more than thirty US states, though the specific requirements vary by state and subject area.
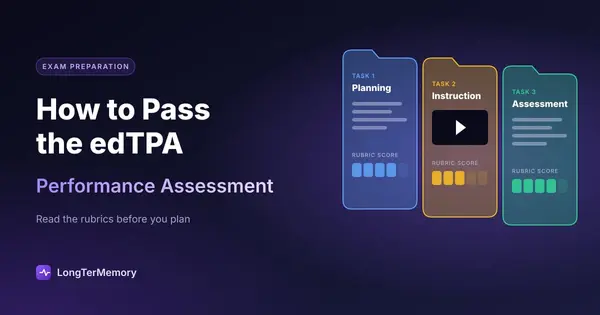
The assessment is divided into three interconnected tasks:
- Task 1: Planning for Instruction and Assessment
- Task 2: Instructing and Engaging Students in Learning
- Task 3: Assessing Student Learning
Each task requires you to submit artifacts (lesson plans, student work, video clips) and written commentary analyzing those artifacts in relation to student learning, research-based practices, and your specific context.
The three tasks are designed to reflect the full teaching cycle: plan, teach, and assess. What makes the edTPA demanding is that you’re not just doing these things. You’re documenting them, recording them, and explaining them in explicit academic language.
Understanding the Scoring Rubrics
Before you write a single word or record a single minute of video, read the rubrics. The edTPA uses standardized rubrics with performance levels typically ranging from 1 to 5 on each criterion (though this varies slightly by handbook). Scorers are trained to apply these rubrics consistently, which means the rubrics are the ground truth for what a passing submission looks like.
Each handbook (there are separate handbooks for different subject areas: Elementary Education, Secondary English Language Arts, Secondary Mathematics, Secondary History/Social Studies, Biology, etc.) has specific rubrics for that discipline. Download your handbook from the Pearson/edTPA website and read it carefully before you begin planning the teaching segment.
Common rubric themes across handbooks include:
- Alignment between learning objectives, instruction, and assessment
- Evidence of student engagement and participation
- Use of academic language
- Analysis of student learning data
- Feedback that supports learning
- Connections to research and theory
A passing score at the rubric level typically requires evidence that you’re not just describing what happened, but analyzing it: explaining why it happened, what it means for student learning, and what you’d do differently or continue doing based on that analysis.
Task 1: Planning for Instruction and Assessment
Task 1 is where you establish the context for everything that follows. It includes:
- A Context for Learning form describing your placement school, student demographics, and the specific learning needs of the class
- A sequence of 3-5 lesson plans forming a coherent learning segment
- Instructional materials used (worksheets, slides, texts, etc.)
- Assessment materials (formal or informal assessments you’ll use to track learning)
- Written commentaries analyzing your planning decisions
The Learning Segment
Your learning segment needs to show coherence. Each lesson should build on the previous one, and the whole segment should be oriented toward a central learning goal. One common mistake candidates make is submitting five separate lesson plans that happen to be on the same topic rather than five lessons that function as a connected sequence.
Think about it this way: by the end of your learning segment, what should students be able to do that they couldn’t do at the beginning? That answer is your learning goal. Every lesson, activity, assessment, and instructional decision should connect back to it.
Academic Language
The edTPA places significant emphasis on academic language development, meaning the vocabulary, syntax, and discourse functions specific to your discipline. You need to identify:
- A central language demand of the learning segment (such as vocabulary, language function, syntax, or discourse)
- How your instruction explicitly supports students in developing that language
- How you assess student development of academic language
This section trips up many candidates because it sounds abstract. Here’s a concrete example: in a secondary science class, the academic language demand might be “analyzing data and making evidence-based claims.” Your language supports might include sentence frames for writing claims (“Based on the data, I can conclude that…”), explicit instruction on the components of a scientific argument, and opportunities to practice using these structures orally and in writing before being assessed on them.
Commentary Tips for Task 1
- Use specific evidence from your lesson plans and materials to support every claim
- Reference the specific students in your class (by descriptor, not name: “the English Learner in my third period”) rather than speaking in generalities
- Use educational research language: terms like “formative assessment,” “scaffolding,” “differentiation,” and “metacognition” should appear naturally, not shoehorned in
- Explain the “why” behind every significant decision, not just the “what”
Task 2: Instructing and Engaging Students in Learning
Task 2 is the video task, and for many candidates, it’s the most anxiety-inducing. You’ll submit one or two video clips totaling no more than fifteen minutes of continuous teaching, along with written commentary analyzing what happened in the video.
Recording Your Video
The video clips must show meaningful interaction between you and your students. They shouldn’t show you lecturing to passive students for fifteen minutes. Scorers want to see:
- You facilitating student thinking, not just presenting information
- Students actively engaging with the content (discussion, problem-solving, responding to questions)
- Evidence that you’re monitoring student understanding in real time and adjusting accordingly
- Examples of academic language in use
Practical tips for video recording:
Position the camera to capture both you and your students. A static camera placed at the back or side of the room usually works better than a moving handheld recording. Make sure audio is clear enough to hear both your instruction and student responses. If the audio is unclear, the scorer can’t evaluate what’s happening.
Do a test recording before your actual submission day to check audio and video quality. Nothing is worse than recording what you think is your best lesson and discovering the audio was inaudible.
Wear a clip-on microphone if possible. This dramatically improves the chances that your voice, and student voices during discussion, are captured clearly.
Choosing Your Clips
You’re selecting segments from your teaching that best demonstrate your instructional competence. This means:
- Look for moments where you respond to student misconceptions or confusion in real time
- Include evidence of student engagement (students talking, writing, or working actively)
- Show evidence of differentiation or accommodation for specific student needs if that’s mentioned in your planning commentary
- Avoid clips that are just you talking while students listen
One useful strategy is to record more video than you need (with appropriate permissions in place), then review it carefully to identify the strongest clips. Many candidates discover that the lesson they thought was their best wasn’t actually their best on camera, and a quieter lesson captured evidence of more authentic student learning.
Task 2 Commentary
The commentary for Task 2 asks you to analyze your teaching in the clips. Key things to address:
- What were students learning, and what evidence in the clip demonstrates this?
- How did you respond to evidence of student understanding or misunderstanding in the moment?
- What would you do differently if you taught this segment again, and why?
This last question, the reflection question, is where many candidates write something vague like “I would be more clear in my instructions.” A stronger response connects the observation to a specific moment in the video and explains the specific instructional decision you’d make instead, with a rationale grounded in theory or research.
Task 3: Assessing Student Learning
Task 3 asks you to demonstrate your ability to use assessment data to understand student learning and plan next steps. You’ll submit:
- An assessment from your learning segment (a formative or summative tool)
- Student work samples from three students (one who performed below expectations, one at expectations, and one above expectations)
- Written commentary analyzing student performance and planning next steps
Analyzing Student Work
The analysis section is where many candidates struggle because it requires moving beyond surface-level description. Don’t just say “Student A got 7 out of 10 questions correct.” Analyze what the errors reveal about that student’s understanding:
- What concepts does the work evidence demonstrate understanding of?
- What patterns of error or confusion are visible?
- What does this tell you about the student’s current understanding of the learning goal?
- What specific instructional response would address the identified gap?
Write a separate analysis for each of the three work samples, and then write an overall analysis of the whole class’s performance based on the full assessment data. The whole-class analysis should identify patterns (what do most students understand? what do most students struggle with?) and then describe how you would use that information to plan subsequent instruction.
Feedback Commentary
Task 3 also asks you to demonstrate the quality of feedback you provide to students. The feedback you give students on their work samples should:
- Be specific to the individual student’s work (not generic)
- Address both what the student did well and what they should work on
- Be actionable (the student can actually use it to improve)
- Connect to the learning goals of the segment
A generic comment like “Good work!” or “Needs improvement” will not score well. A specific comment like “Your explanation of the water cycle correctly identifies evaporation and condensation. For your next draft, explain what drives evaporation, specifically the role of heat energy, to make your causal chain complete” is the kind of feedback the rubrics reward.
The Commentaries: Writing That Actually Scores Well
Across all three tasks, the written commentaries determine the majority of your score. The quality of your commentary comes down to a few consistent principles:
Cite your artifacts specifically. Don’t write vague generalizations. Reference specific pages in your lesson plans, specific moments from your video (by timestamp), specific student work samples. “In clip 2, at approximately 4:30, a student asks…” is stronger than “during the video, a student demonstrated misunderstanding.”
Use the language of the rubrics. The rubrics use specific terms. Use those same terms in your commentary. If the rubric assesses how you “support academic language development,” make sure those exact words appear in your commentary, alongside concrete evidence.
Distinguish between describing and analyzing. Description says what happened. Analysis explains why it happened and what it means. Scorers distinguish between the two, and high-scoring commentaries are predominantly analytical, not descriptive.
Avoid hedging language. Phrases like “I tried to…” or “I hoped that…” signal uncertainty. Use confident, declarative language about your instructional decisions: “I chose this question to surface student misconceptions about…” is stronger than “I thought this question might help with…”
Time Management: The Biggest Challenge
The edTPA is not just intellectually demanding, it’s logistically complex. Many candidates underestimate the time required and submit under significant time pressure, which almost always reduces quality.
A realistic timeline for most candidates looks like this:
| Phase | Time Needed |
|---|---|
| Read handbook and understand requirements | 1-2 days |
| Plan learning segment (Task 1 lessons) | 1-2 weeks alongside fieldwork |
| Teach and record learning segment | 1 week |
| Select and prepare video clips | 2-3 days |
| Score and compile student work samples | 2-3 days |
| Write all commentaries | 2-3 weeks |
| Revise, proofread, and format | 3-5 days |
Give yourself at least six weeks from the start of your teaching segment to submission. Trying to complete the edTPA in three weeks while student teaching full-time is genuinely difficult and often produces commentary that is rushed and superficial.
Using Support Resources
You don’t have to navigate edTPA alone. Most teacher preparation programs have faculty advisors, university supervisors, or dedicated edTPA coaches. Use them. Share drafts of your commentaries and ask for specific feedback on whether your analysis meets the rubric criteria.
Peer review is also valuable. Exchange commentaries with fellow candidates and read each other’s drafts critically. If your peer can tell you which rubric criterion each paragraph in your commentary addresses, it’s well-organized. If they can’t, you need to restructure.
The edTPA website and your program’s preparation materials contain evidence samples and annotated examples. These are genuinely useful for understanding what scorers consider high-quality evidence. Reading two or three sample commentaries at different score levels gives you a concrete sense of the difference between a 3 and a 5 on a given criterion.
Organize your study materials with LongTerMemory if you need to retain specific educational theory, research, and terminology for your commentaries. Having quick access to the theoretical frameworks relevant to your subject area (direct instruction, inquiry-based learning, Universal Design for Learning, culturally responsive teaching) helps you write commentaries that integrate research naturally rather than awkwardly.
The Mindset That Makes the Difference
Candidates who do well on the edTPA tend to share a particular mindset: they treat it as a genuine reflection exercise rather than a bureaucratic hoop to jump through. The questions the edTPA asks, why did you make this instructional decision, what does this student’s work tell you about their understanding, how would you adjust your teaching based on this data, are the actual questions that effective teachers ask themselves continuously throughout their careers.
The candidates who struggle are often the ones who try to write what they think the scorers want to hear rather than genuine, evidence-based analysis of what actually happened in their teaching. Scorers have reviewed thousands of submissions. They can tell the difference.
Your student teaching placement is also a real classroom with real students. The skills the edTPA is trying to assess, planning intentionally, teaching responsively, analyzing learning data, actually matter for those students. That’s worth keeping in mind when the process feels overwhelming.
You’re not just building a portfolio. You’re developing the core habits of a reflective professional educator.