How to Use Flashcards for Science Lab Practical Exams
A complete guide to lab practical exam prep with flashcards: visual cards for specimens and equipment, procedure decks, and pairing review with bench time.
Table of Contents
- What Lab Practicals Test That Written Exams Don't
- Building Visual Flashcards for Specimens, Equipment, and Procedures
- Specimen and Structure Cards
- Equipment and Setup Cards
- Procedure Cards
- The Time Cost Problem, and How to Cut It
- Pairing Card Review With Hands-On Practice
- A Note on Timing: Start the Deck in Week One
The first lab practical exam is a rite of passage in every science program, and it usually goes the same way. You studied hard, your written-exam grades are fine, and then you walk into a room full of numbered stations, a microscope with something pink under it, a bone with a pin stuck in a bump you have never consciously looked at, a beaker setup you have seen a dozen times but never had to name, and a timer that gives you 60 seconds before the buzzer moves you along.
Somewhere around station five, the realization lands: knowing about things and recognizing things are different skills, and you trained the wrong one.
The good news is that lab practicals are extremely trainable, arguably more predictable than written exams, once you prepare for what they actually test. And the humble flashcard, done right, is the single best tool for the job. Let me show you the whole system.
What Lab Practicals Test That Written Exams Don’t
A written exam mostly asks you to produce or select verbal knowledge: define, explain, compare. A lab practical tests three different things, and your prep has to hit all three:
1. Visual identification under time pressure. Can you look at a specimen, slide, structure, or instrument and name it in seconds? Not “recognize it when it is labeled in the textbook’s perfect diagram”, but recognize the real, messy, imperfect thing, at an odd angle, in bad lighting, when the tissue is stained slightly differently than the one in lecture. This is recognition memory tied to real visual variation, and it only develops through repeated exposure to varied examples.
2. Procedural knowledge in sequence. What do you do first, next, and why? Which reagent, which setting, which safety step? Practicals love asking “what step comes after X” or presenting a setup with one error to spot, precisely because sequences fall apart under stress if they were memorized as prose instead of as steps.
3. Function and context attached to the thing in front of you. The pin is not just in the greater trochanter, the follow-up asks what attaches there. The slide is not just cardiac muscle, the question asks how you know it is not skeletal. Identification opens the door; the point usually comes from the fact attached to the identification.
Notice what all three have in common: the cue is visual or physical, not verbal. That is the core insight for studying. If all your review materials give you verbal cues (your notes, the textbook’s tidy lists), you are practicing with the wrong cue type, and the exam will feel like it is in a foreign language. Your flashcards need to ask questions the way the exam asks them: with pictures.
Building Visual Flashcards for Specimens, Equipment, and Procedures
The rule that governs everything in this section: the front of the card should look like the exam station. Everything else follows from it.
Specimen and Structure Cards
For anatomy, histology, botany, zoology, geology, anything where you identify physical things:
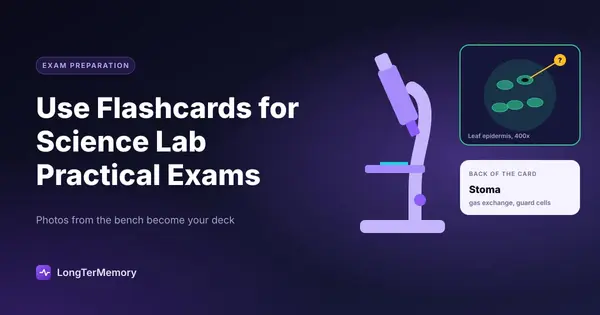
- Front: an unlabeled image. Back: the name plus one high-yield fact. For example, front: photo of a slide; back: “Cardiac muscle, note intercalated discs and central nuclei, involuntary.”
- Use multiple images per structure, from different sources. The single biggest failure mode of visual decks is learning one specific photo instead of the structure. If you can only recognize the trapezius in your textbook’s exact figure, you have memorized a picture, not learned anatomy. Pull images from your lab manual, lecture slides, open resources, and, best of all, photos you take yourself in lab (if your instructor permits it, most do). Your own photos are gold, because the exam will use your lab’s actual specimens.
- Make reverse cards for the attached facts. Front: “Which muscle elevates and retracts the scapula?” Back: the name plus the image. Practicals test both directions.
- Crop aggressively. A card showing the whole slide teaches you to find the structure with context. A card showing a tight crop teaches you the structure’s own appearance. You need both, and the cropped version is usually the one students skip.
Equipment and Setup Cards
- Front: photo of the instrument or assembled apparatus. Back: name, function, and the classic exam add-on (“what is this used to measure”, “what error does this setup contain”).
- Include cards for readings: a photo of a graduated cylinder at eye level, a multimeter display, a balance readout. “Read this measurement” is a beloved practical question and almost nobody drills it.
Procedure Cards
Sequences need a different card format. Long “list all steps” cards fail, they are miserable to review and your brain rehearses the list’s beginning far more than its middle. Instead, atomize:
- One transition per card. Front: “Gram stain: what comes immediately after crystal violet?” Back: “Iodine (the mordant).” Ten transition cards beat one list card.
- Why-cards for each critical step. Front: “Why is the decolorizer timing critical in a Gram stain?” Back: the mechanism. Practicals increasingly ask why, because it separates understanding from choreography.
- Error-spotting cards. Front: photo or description of a flawed setup. Back: the flaw. If your instructor shares past practical formats, mirror them.
The Time Cost Problem, and How to Cut It
Here is the honest downside: visual decks are wonderful to review and slow to build. Screenshotting, cropping, labeling, and typing facts for 200 structures can eat entire weekends, and the building itself produces little retention.
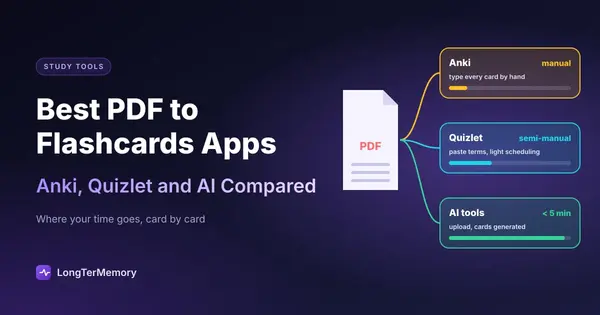
Two ways to fight the overhead. First, split the work with your lab group, four people each covering a quarter of the material produces a full deck in one evening, and explaining your quarter to the group is retrieval practice in itself. Second, automate the text side: a pdf to flashcards tool can ingest your lab manual and lecture PDFs and auto-generate the question-answer pairs, giving you the entire verbal layer (functions, sequences, reagents, why-questions) without typing a single card, complete with spaced repetition scheduling built in. That frees your manual card-building time for the one thing automation cannot do for you yet: the image-front cards from your own lab’s specimens.
Pairing Card Review With Hands-On Practice
Flashcards alone will get you to maybe 80% on a practical. The last stretch requires the real thing, and the smart move is making the cards and the bench time feed each other, because they fix each other’s blind spots. Cards give you unlimited, spaced, randomized repetitions; the bench gives you three dimensions, texture, and the actual specimens you will be tested on.
Use open lab hours as retrieval sessions, not tours. Most departments offer open lab time before practicals, and most students use it to walk around looking at labeled specimens, which is re-reading in physical form. Go with a partner instead and run it like the exam: one of you points, the other names and gives the attached fact, cold, before checking the label. Every miss gets photographed and becomes a flashcard that evening. This single habit, treating open lab as testing rather than viewing, is the highest-yield hour in all of practical prep.
Build your own mock practical. In the last week, set up ten stations from your weakest cards (the ones your spaced repetition system keeps showing you, it knows), give yourself 60 seconds each, no rewinds, answers written not spoken. The time pressure and the no-going-back rule are trainable stressors: the second mock always feels calmer than the first, and you want the real exam to be your third or fourth exposure to that format, not your first.
Sequence the two modes deliberately. The rhythm that works:
| Phase | Cards | Bench |
|---|---|---|
| Weeks out | Build decks, daily spaced review | Normal lab sessions, take photos |
| ~2 weeks out | Review shifts to weak cards | Weekly open-lab retrieval session with partner |
| Final week | Short daily reviews, weakest cards only | Mock practical, then target the misses |
Let each mode audit the other. Structures you nail on cards but fumble at the bench mean your images lack variety, add angles, add your own photos. Structures you nail at the bench but miss on cards usually mean you are using location context (“it is the jar on the left shelf”) instead of features, which will burn you when the exam presents things out of context. Both failure patterns are invisible until you practice both ways.
If building the deck is what keeps you from starting early, LongTerMemory can help. Upload your lab manual, procedure notes, or photos of your annotated diagrams, and it generates question and answer flashcards automatically, then schedules them with spaced repetition across the whole term.
A Note on Timing: Start the Deck in Week One
Everything above works best with one scheduling decision: build cards as the labs happen, not in the two weeks before the exam. Ten cards after each lab session, photographed that day, reviewed on a spaced schedule from day one, produces a strange and delightful experience come exam month: while your classmates begin cramming a semester of specimens, you are doing ten-minute maintenance reviews of material you already know.
Spaced repetition is the engine that makes this cheap. Cards you know keep receding into the future; only the strugglers show up daily. By exam week, your review load is small, targeted, and calm, which is exactly the state of mind you want to carry into a room full of numbered stations and a ticking timer.
Walk in having seen everything, from multiple angles, hundreds of times, with the facts attached. The buzzer stops being a threat. It is just the sound of you moving to the next thing you recognize.